Introduction
Whether you’re clearing out your garage or salvaging old pallets, scrap wood can be transformed into stylish home décor, handy organisers, and quick-sell crafts. With sustainability trending and handmade goods in high demand, these projects not only reduce waste but also open up income opportunities for hobbyists.
Scrap wood projects for small budgets are a fun and budget-friendly way to tap into your creativity while creating something useful or beautiful from leftover materials. At a time when sustainability and minimalism are more than just trends, scrap wood projects have become the go-to solution for hobbyists and beginners alike.
Are you looking to maximise your tiny apartment, add rustic charm to your home, or even start a small craft business? Scrap wood is your best friend. These projects are especially suitable for beginners because they require minimal investment, utilise easily accessible tools, and leave room for creative experimentation.
With some basic knowledge and a little imagination, you can transform discarded wood into delightful items, such as wall shelves, keyholders, planter boxes, or even a compact coffee table. If your goal is to explore wood projects for small spaces, these scrap wood builds offer the perfect blend of affordability, sustainability, and functionality.
In this blog post, we’ll walk you through everything you need to start creating amazing things with scrap wood: the essential tools, where to find your materials, safety considerations, and seven beginner-friendly projects you can complete in a weekend. Let’s dive in!
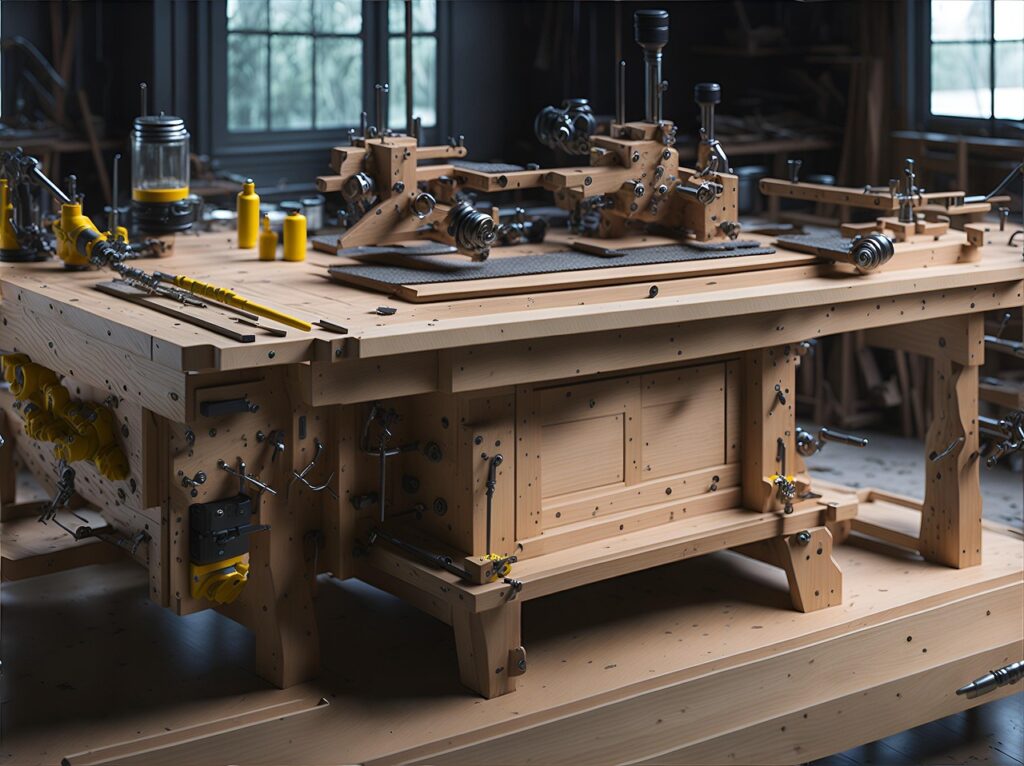
Tools You’ll Need for Scrap Wood Projects
1. Measuring Tape
Every great project starts with accurate measurements. A good measuring tape ensures that your cuts and joins are precise, even with scrap materials. It helps mark out dimensions for cuts, alignment, and layout. Even a small measuring error can result in uneven joins or unstable structures, especially in tight spaces such as small entryways or tabletops. Measure twice—cut once—is the golden rule of woodworking, even when using leftovers.
2. Saw (Hand Saw or Circular Saw)
To shape your scrap wood into usable pieces, you’ll need a saw. A hand saw is perfect for basic cuts, while a circular saw speeds things up for larger projects. Choose a fine-tooth blade when working with softwoods for a cleaner edge. Always clamp your wood securely before cutting to ensure safety and precision. Straight, clean cuts are the foundation of a professional-looking build, no matter how simple the project.
3. Sander or Sandpaper
Smoothing your wood is essential for both safety and aesthetics. A sanding tool—or even just sheets of sandpaper—removes splinters, evens out surfaces, and preps the wood for paint or stain. Start with a coarse grit (like 80) and finish with a fine grit (like 220) for a polished, touchable surface. A well-sanded project also absorbs finishes more effectively and appears far more professional.
4. Drill or Cordless Driver
For assembling your wood pieces, a drill or cordless driver is invaluable. Use it to drive screws or drill pilot holes to prevent splitting, especially in narrow or brittle scrap wood. A cordless drill offers the flexibility to work in tight spaces, which is a significant advantage in small-space projects. Consider using countersink bits for flush screw finishes that make staining and painting easier.
5. Wood Glue
Wood glue is your secret weapon for seamless joints. It’s ideal for places where screws would distract from your design, like in tablet or phone stands. Apply evenly and clamp tightly for at least 30 minutes to form a strong bond. Though it’s not a substitute for screws in heavy-duty builds, it adds an extra layer of durability and helps reduce creaking and wobbling in your projects.
6. Clamps
Clamps act like extra hands during the assembly process. Bar clamps, corner clamps, and spring clamps help keep your wood stable while glueing, drilling, or sanding. They also ensure tight joints and proper alignment. For projects such as trays or planter boxes, clamps are essential for achieving sharp corners and preventing shifting during the drying process. Keep a few types in your toolbox—they’ll speed up your workflow tremendously.
7. Speed Square
A speed square is perfect for marking clean 90-degree angles and checking squareness while assembling. It ensures that your pieces join correctly, especially important in projects like key holders, floating shelves, or boxes. You can also use it as a saw guide for minor cuts. It’s a small tool with a significant impact on the accuracy and visual appeal of your work.
8. Wood Chisel Set
Chisels are helpful for fine adjustments, trimming corners, and cleaning up excess glue. Even in beginner projects, you may need to make small notches or refine joints. A sharp chisel enables you to shape, refine, or add decorative details with precision and accuracy. It’s especially useful in tight spots where power tools can’t reach.
9. Pencil and Marking Gauge
Marking your cut and drill lines clearly is essential for consistency. A sharp carpenter’s pencil paired with a marking gauge helps ensure straight, repeatable lines. This comes in handy when making multiple identical cuts or when spacing hooks, shelves, or panels evenly. Neat marks save time and prevent mistakes down the line.
10. Paintbrush or Foam Brush
Once your project is built, a high-quality brush will help you apply paint, stain, or sealer with a clean, even finish. Foam brushes are great for avoiding streaks, while traditional brushes work better with textured or rough wood. A good finishing job not only protects your piece from wear and tear, it enhances its look and gives it that handcrafted charm.
Fun Fact:
Did you know sanding your wood before finishing doesn’t just smooth the surface—it actually opens up the pores of the wood, allowing the paint and stain to absorb more evenly and last longer?
Sources of Scrap Wood You Can Use
Finding scrap wood is often easier than you think. With a bit of creativity and awareness, you can collect excellent materials for wood projects for small spaces—often for free!
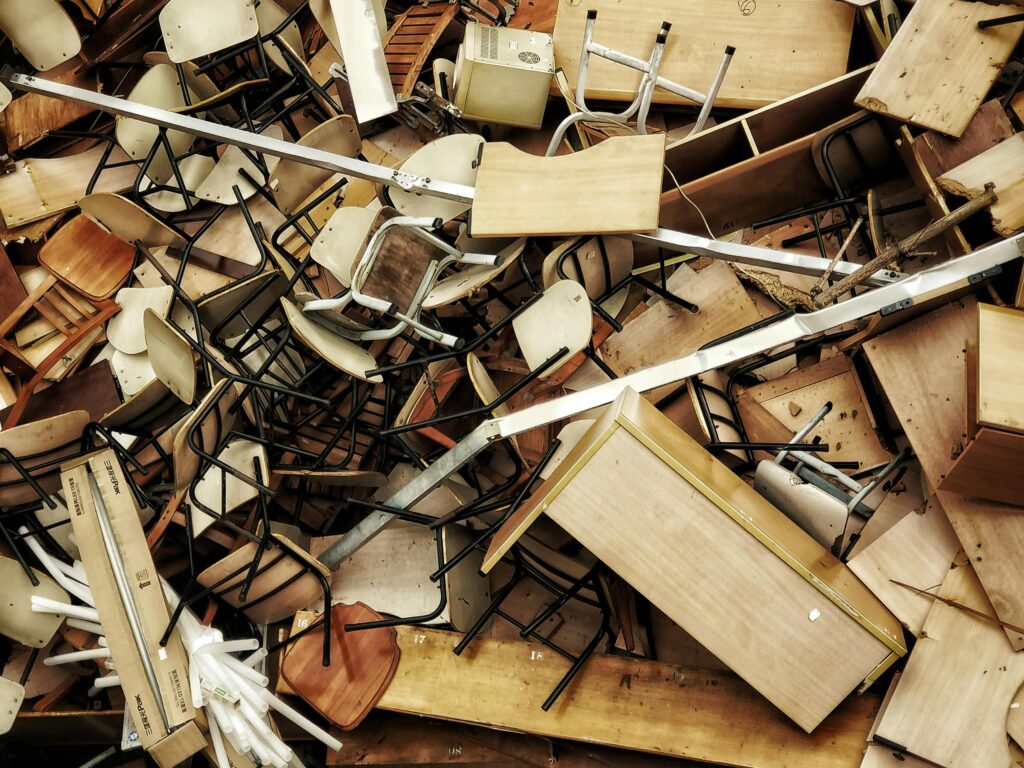
Old Furniture
Broken chairs, worn-out tables, and discarded bookshelves are hidden treasures for scrap wood projects. Most old furniture is made from seasoned, pre-finished wood that resists warping and cracking, making it ideal for reuse. Look for flat panels, legs, drawer fronts, or even decorative trim that can be repurposed into shelves, hooks, or trays. Sand off any varnish or paint, and you’ll have high-quality wood at zero cost. Don’t overlook curbside pickups or relatives clearing out their homes—they’re often more than happy to pass on old pieces.
Pallets
Wood pallets are a favourite among DIY enthusiasts for their rustic appeal and widespread availability. Found near warehouses, retail stores, and construction sites or listed online for free, pallets can be made from hardwood or softwood and offer excellent structural boards for creative projects. They’re perfect for planters, wall décor, or furniture.
Always check for clean, undamaged pallets marked “HT” (heat-treated) rather than “MB” (chemically treated), and dismantle them carefully with a pry bar or pallet buster. With a bit of sanding and care, pallet wood becomes a versatile, character-rich building material.
Construction Offcuts
Local construction sites and renovation zones are prime sources for wood offcuts and leftovers. Short planks, trims, plywood scraps, or framing wood are often discarded and can be collected—make sure to ask for permission first. These scraps are ideal for smaller projects, such as phone stands, key holders, or test projects before cutting premium wood.
Always wear gloves and check for nails, adhesives, or splinters. Contractors are often happy to see their waste put to use instead of going to the landfill, especially if you’re respectful and upfront.
Wooden Crates and Boxes
Old fruit crates, wine boxes, or shipping containers are great for rustic-style projects and small storage solutions. These sturdy, pre-built forms can be upcycled into planters, cubbies, display boxes, or even floating shelves. You’ll often find them at local farmers’ markets, liquor stores, or recycling centres.
Check for old staples, labels, or rough edges and clean them up before repurposing. Their vintage charm adds instant character to any project—plus, they require minimal cutting and assembly, making them ideal for beginners.
Home Renovation Discards
When neighbours or friends remodel, ask if you can salvage their old trims, baseboards, panelling, or cabinet doors. These pieces are often headed for the dumpster but can be repurposed into stunning decorative items, such as photo frames, coat racks, or rustic wall art. Be sure to inspect for cracks, rot, or embedded nails before use.
Renovation discards often include high-quality wood that is already cut to usable sizes, saving you time and money. Local classifieds or online groups usually list free building materials from ongoing renovations.
Fun Fact: Many cities have active “Buy Nothing” groups on Facebook or WhatsApp where people give away scrap wood, crates, pallets, and other materials for free. It’s a treasure trove for resourceful DIYers!
Special Care When Buying or Using Scrap Wood
Using scrap wood is both eco-friendly and cost-effective, but safety and suitability are vital when working with reclaimed materials. Here’s what to watch for when preparing wood for DIY wood projects for small spaces:
Check for Nails and Screws
Before cutting or drilling into any scrap wood, inspect it thoroughly for embedded nails, screws, or staples. Hidden metal pieces can damage your tools—especially saw blades—and pose serious safety risks. Use pliers to remove visible fasteners, and then run a magnet or handheld metal detector across the surface to detect any that may have been missed. This step is crucial, particularly with pallet wood or demolition scraps, where leftover hardware is standard. Taking time here can save you expensive tool repairs and keep your workspace safe.
Look for Rot or Mould
Wood that’s soft, crumbling, or smells musty could be rotting or mouldy, making it unsafe and structurally weak for DIY projects. Rotten wood won’t hold screws, nails, or glue properly, which means your builds may fall apart over time. If you’re unsure, break off a small piece—the wood should snap cleanly and show a solid grain. Avoid any boards that show signs of water damage, fuzziness, or discolouration. Even in rustic or outdoor builds, structural integrity matters for safety and longevity.
Beware of Treated Wood
Some scrap wood—especially pallets, fencing, or construction materials—may be chemically treated to resist pests or moisture. While this can be useful for outdoor projects, it poses a significant concern for indoor use or any application involving food or children. Avoid wood marked “MB” (Methyl Bromide), as it’s a toxic pesticide harmful to health. Instead, look for heat-treated options stamped “HT,” which are much safer and environmentally friendly. When in doubt, avoid using mystery wood for furniture, toys, or cutting boards.
Clean and Sand Thoroughly
Scrap wood often comes dirty, painted, or coated in old adhesives. Use a wire brush or scraper to remove surface grime, old glue, and paint chips before sanding. Once cleaned, sand the surface, starting with coarse grit and finishing with fine grit, to reveal the natural grain and prep it for staining or painting. This not only improves appearance but also allows finishes to adhere more evenly and last longer. Proper prep work turns discarded wood into something beautiful and long-lasting.
Pro Tip:
Look for the “HT” stamp on pallets—it stands for “heat-treated,” indicating that the wood was sterilised with heat rather than chemicals. This makes it much safer for indoor projects and anything that comes into contact with food or skin.
Seven In-Demand Scrap Wood Projects for Beginners
If you’re looking for DIY wood projects for small spaces, these seven beginner-friendly builds are not only functional and stylish—they’re also incredibly rewarding to make with minimal tools and a low budget. Whether you’re decorating your home or crafting gifts, these scrap wood ideas bring creativity and purpose to your leftover lumber.
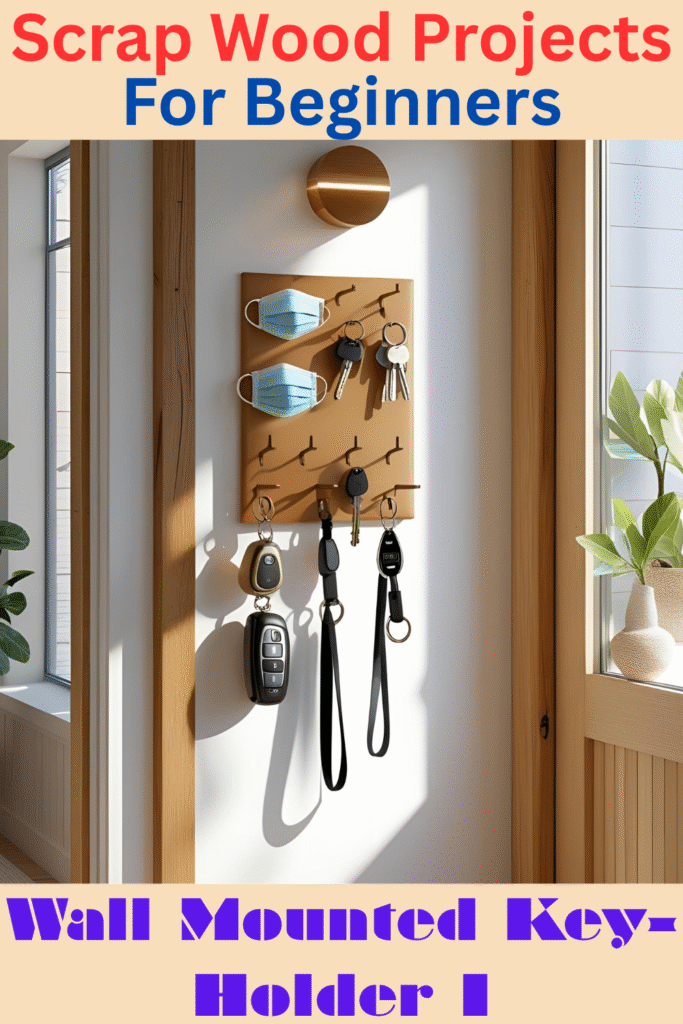
1. Wall-Mounted Key Holder
Simple yet functional, this compact organiser can be made from a single piece of scrap wood and a few hooks. Perfect for small entryways, it keeps your keys, masks, or pet leashes in one accessible spot.
You can personalise it with stencilled text, such as “Welcome” or “Keys Here”, paint it in bold or rustic tones, or add decorative knobs for a vintage look. Want extra functionality? Attach a mini chalkboard or magnetic strip for quick notes or mail.
This project is an excellent introduction to working with wall-mounted items. All you need is a drill, a few screws or nails, some hooks, and a little creativity. It’s also a thoughtful, handmade gift idea for new homeowners.
2. Floating Bookshelf
Use leftover planks to create a minimalist bookshelf that mounts directly onto your wall. Ideal for small living spaces and bedrooms, floating shelves help you maximise vertical storage while keeping the floor clear and uncluttered.
Cut the planks to various lengths for a custom look, and stack multiple shelves in a staggered or symmetrical layout for visual interest. Use pocket holes for invisible joints and reinforce them with wall anchors to support heavier items, such as hardcover books or decorative items.
Paint them in accent colours or apply a weathered stain to create a farmhouse vibe. These shelves also work well in kitchens for displaying mugs, spice jars, or collectables—adding both function and flair.
3. Rustic Wooden Planter Box
Build a small rectangular planter from pallet wood, fence boards, or other scrap lumber. Great for herbs, succulents, or small flowers, these boxes bring a touch of greenery into compact living spaces, such as balconies, patios, or windowsills.
Line the interior with plastic sheeting, a trash bag, or landscape fabric to protect the wood and retain moisture. For added charm, consider burning or stencilling plant names like “Basil” or “Aloe Vera” on the front. Add small feet or handles for easy movement.
This is a fantastic project to practice measuring, sawing, and joining simple rectangles. Best of all, you can scale the design to fit indoor counters or outdoor railings.
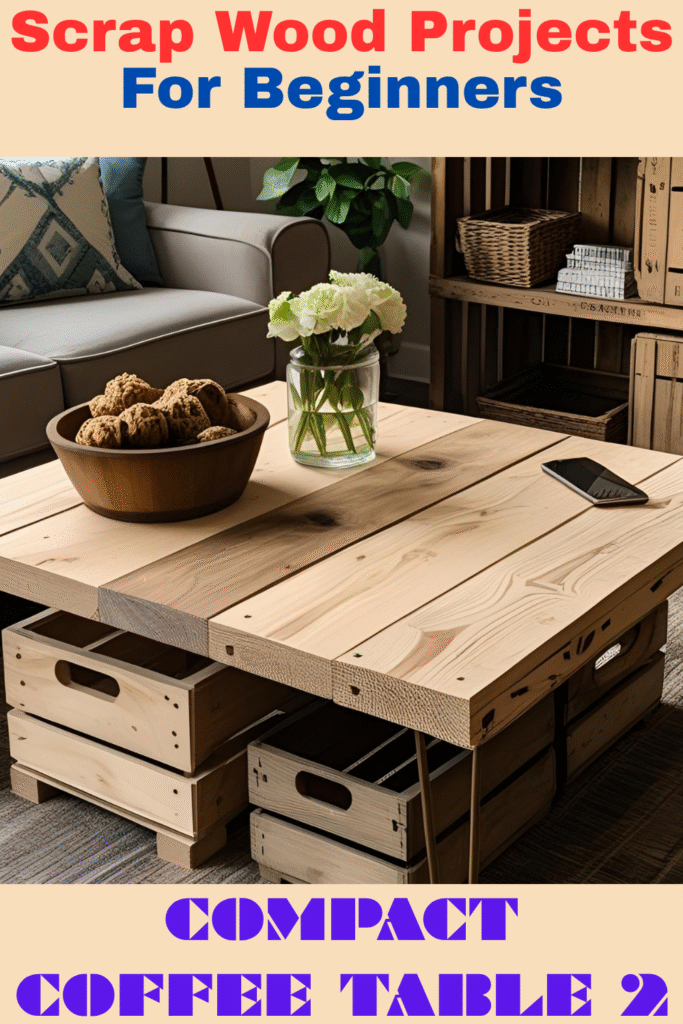
4. Compact Coffee Table
Combine a few thick scrapboards to form a sturdy tabletop, then add short legs, crates, or even hairpin legs for a rustic, space-saving table that fits well in small living rooms or studio apartments.
Great for in front of a loveseat, this table can double as a workstation, snack spot, or even a footrest. Want storage? Add a bottom shelf or a hidden drawer using leftover plywood. Use wood filler to smooth gaps between boards, and then finish with your choice of varnish, paint, or epoxy resin for a sleek, smooth surface.
You’ll get to practice edge joining, levelling, sanding, and finishing—key woodworking skills that make this an excellent step-up project for beginners.
5. Tablet or Phone Stand
Make a stylish yet straightforward phone or tablet stand using just two pieces of wood cut at complementary angles. This handy accessory is perfect for desks, countertops, or nightstands, keeping your device upright and hands-free.
Great for following recipes, Zoom calls, or watching videos, you can also modify the design to hold books or e-readers. Drill a slot at the base for a charging cable or carve out a groove for stylus storage.
Want it extra fancy? Use hardwood scraps like walnut or oak and sand it to a silky smooth finish. This project is quick but teaches essential precision techniques in cutting and shaping angles.
6. Wall Art Panel
Turn your random off-cuts into eye-catching décor! Arrange uneven scraps like a puzzle, glue them to a backing board, and create a mosaic-style wall panel full of texture and personality.
Play with contrasting tones, wood grains, and shapes—try chevrons, stripes, or geometric patterns. You can use mitred corners for a refined look or keep raw edges for a rugged charm.
Once assembled, seal the surface with clear polyurethane for protection or add a splash of colour with diluted paint washes. This is a zero-waste project that transforms wood waste into stylish art, perfect for blank hallway walls, above beds, or entryway accents.

7. Mini Wooden Organiser Tray
Create a sleek catch-all tray using thin scrap wood boards or panel offcuts. These trays are perfect for organising desk supplies, jewellery, coins, or keys—and they look great on entry tables, dressers, or coffee tables.
You can build square, rectangular, or custom-shaped trays with raised sides and a flat base. Add handles, felt feet, or inner dividers for extra usability. Try using contrasting wood types for a stylish layered look. You’ll practice clean joins, corner clamping, and fine sanding, making it a beginner project with professional-looking results. These also make excellent gift items or quick Etsy-worthy products.
Fun Fact:
Wooden phone and tablet stands crafted from reclaimed wood are among the top-selling handcrafted items on Etsy, often fetching $15–$40 per unit, depending on the level of craftsmanship and design.
Q&A: Scrap Wood for Beginners
Q1: Can I do scrap wood projects without prior woodworking experience?
Absolutely! Most scrap wood projects are beginner-friendly and require only basic tools, such as a saw, drill, sandpaper, and wood glue. Many simple builds—such as phone stands, key holders, or trays—can be completed in under an hour and are ideal for learning core skills. Start small, follow a few tutorials, and you’ll build confidence quickly. Plus, working with scrap means there’s little pressure if you make mistakes—grab another piece and try again!
Q2: Is pallet wood safe for indoor use?
Yes, as long as it’s marked with “HT” for heat-treated. This indicates it was treated with heat instead of chemicals, making it safe for indoor furniture, décor, or even planters. Avoid any pallet stamped “MB” (methyl bromide), as that chemical is toxic and unsafe, especially for kitchen items or kids’ toys. When in doubt, stick to pallets that are clean, dry, and clearly labelled, and always sand them thoroughly before use.
Q3: Where can I sell my finished scrap wood items?
Online platforms like Etsy, Facebook Marketplace, and local craft fairs are great places to start selling handmade wood items. These outlets attract customers who value handcrafted, sustainable products made from reclaimed materials. You can also approach local home décor shops or eco-conscious boutiques to see if they’d feature your pieces. Add tags like “reclaimed wood,” “handmade,” and “eco-friendly” to attract more buyers.
Q4: What kind of finish should I use?
For most indoor scrap wood projects, a water-based polyurethane offers a smooth, durable, and low-odour finish. For a more natural look, beeswax or linseed oil are excellent, eco-friendly options that enhance the grain and provide a soft sheen. Always test the finish on a scrap piece first to see how it affects the colour. A good finish not only protects your work but gives it a polished, professional touch that customers will appreciate.
Q5: How can I make money from small scrap wood projects?
Start with popular, giftable items like key holders, shelves, phone stands, or planter boxes—they’re always in demand and easy to produce. Take high-quality photos, write engaging product descriptions, and post them on social media platforms like Instagram and Pinterest to attract attention. Offering custom engraving or personalisation can set your items apart and increase their value. With consistency and creativity, you can turn your hobby into a profitable side hustle.
Fun Fact: A well-finished piece of reclaimed wood décor can sell for five to ten times the cost of the materials.
Detailed Summary for Busy Readers
If you’re short on time but eager to explore scrap wood projects for small spaces, here’s everything you need to know from this blog in one place:
Scrap wood projects are an innovative, sustainable way to create beautiful, functional items while keeping costs low. They’re perfect for beginners who want to dip their toes into woodworking without investing in expensive materials or tools. These projects are ideal for small spaces, utilising compact layouts, wall-mounted designs, and multipurpose builds.
The tools you’ll need include a basic saw, sander, drill, tape measure, and clamps—tools that are affordable and readily available. When sourcing scrap wood, consider looking in places such as old furniture, discarded pallets, renovation leftovers, or construction site offcuts. Always inspect the wood for nails, mould, or chemical treatments before use.
We outlined seven beginner-friendly projects:
- A Wall-Mounted Key Holder that adds style and order to any entryway.
- A Floating Bookshelf that optimises vertical space.
- A Rustic Wooden Planter Box is perfect for herbs and balconies.
- A Compact Coffee Table built from thick board scraps.
- A Phone Stand, practical and perfect for work-from-home setups.
- A Scrap wood Wall Art Panel, turning leftovers into décor.
- A mini wooden organiser tray, perfect for organising desk supplies.
In the Q&A section, we answered key questions about safety, project ideas, resale potential, and best finishes. From understanding pallet codes to monetising your crafts, this section aims to make your journey smoother.
Scrap wood DIYs aren’t just good for the planet; they’re also great for you. They’re fun, quick to build, and even offer small income opportunities if you decide to sell. The blog concludes with guidance for further exploration and encourages you to start with what you already have.
In short, scrap wood is free, versatile, and endlessly creative—perfect for anyone looking to try scrap wood projects for small spaces.
Conclusion: Build Small and Cheap, Dream Big
In today’s fast-paced, space-conscious world, scrap wood projects for small spaces offer more than just a creative outlet—they provide a lifestyle choice rooted in sustainability, resourcefulness, and personal expression. Scrap wood, often seen as waste, becomes your greatest ally in creating meaningful and valuable items.
The six projects we’ve covered are just the beginning. As your skills grow, so will your confidence to experiment, design, and even innovate your own creations. From crafting gifts to starting a small business, the possibilities are endless with just a little wood, a few tools, and a bit of passion.
Don’t forget to always source wood responsibly, ensure safety during every step, and take pride in the unique character of reclaimed materials. The charm of imperfection, the texture of aged wood, and the story behind each piece can make your project not just functional, but deeply personal.
Want to Learn More?
- Follow woodworking blogs and YouTube channels dedicated to building in small spaces.
- Check Pinterest or Instagram for real-world inspiration and layout ideas.
- Join Facebook groups or Reddit communities where fellow beginners share progress and advice.
- Use free design tools like SketchUp to visualise your ideas before cutting wood.
As you explore this new creative path, remember that every beautiful project begins with a single piece of scrap. So grab that forgotten wood pile, dust off your tools, and bring your vision to life. You don’t need a workshop—you need a will to start.
Fun Fact: In Japan, the practice of reusing scrap wood for both beauty and function is known as “Mottainai”—a philosophy that emphasises respect for resources.
Happy building scrap wood projects!

Click here to learn more about woodworking plans for beginners.
Disclaimer: This post, 6 Woodworking Projects for Gardens, may contain affiliate links, which means that I might earn a small commission (at no extra cost to you) if you decide to purchase through one of these links. I only recommend products that are already popular, which I believe will bring value to you. Thanks for the support!